Some time back, I wrote an extensive blog about What constitutes ethical post-processing. I thought I would follow up with a blog that addresses some of most commonly-made post-processing mistakes….and how to avoid them.
1. Start with the White Balance
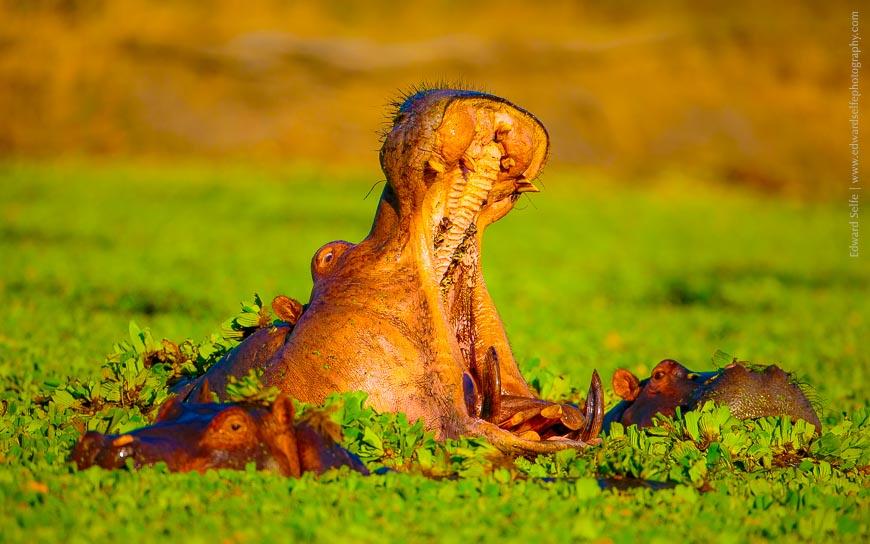
You might have seen images on the web – or even among your own libraries – where the colours just don’t look quite right. Perhaps you can’t put your finger on it, but a recognisable feature just doesn’t ring true. Most likely, you have identified a ‘colour cast’. This is a mis-calculation by the camera which has resulted in the colours of the image shifting towards green or pink or yellow or blue (or a combination of two of these).
When you are working on images (whether Lightroom or another software program) you will likely find tools to work on the white balance. These tool allow you to correct the yellow/blue/green/magenta colour cast that sometimes appears on images. Here is a photo which shows a strong yellow colour cast (right) and the corrected image (left).

It’s not always easy to spot a colour cast; sometimes you don’t see it because you’ve only ever seen that image with the cast and it’s hard to imagine it without!
Ideas:
- Try using the AUTO White Balance tool on your editing software. It won’t often give you the right WB setting but it will make an estimate. This might help you to “see” a cast that you hadn’t noticed before.
- Look for something in the image whose true colour you are familiar with (I guess obvious things would be a red phone box or a brown tree trunk. Using the WB adjustment tools, try to get this as close as possible to correct colour.
- Keep in mind that sometimes it is the colour cast that makes an image – when we photograph wildlife we usually like the golden colours that early morning and late afternoon give us.
- Make sure you get the WB right before you start working with any other colour adjustment tool.
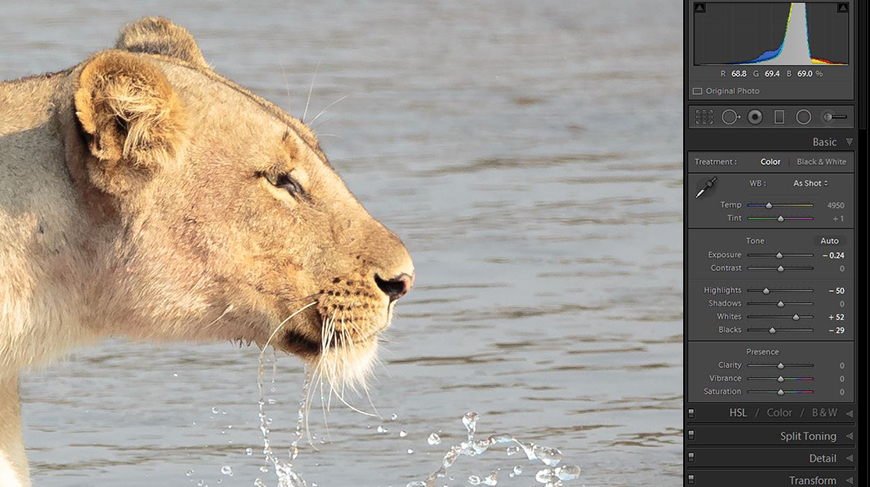
2. Go easy on the Sliders!
Most software packages use sliders to allow you to apply adjustments to images. Here are the sliders in Lightroom, one of the most widely-used processing programs:
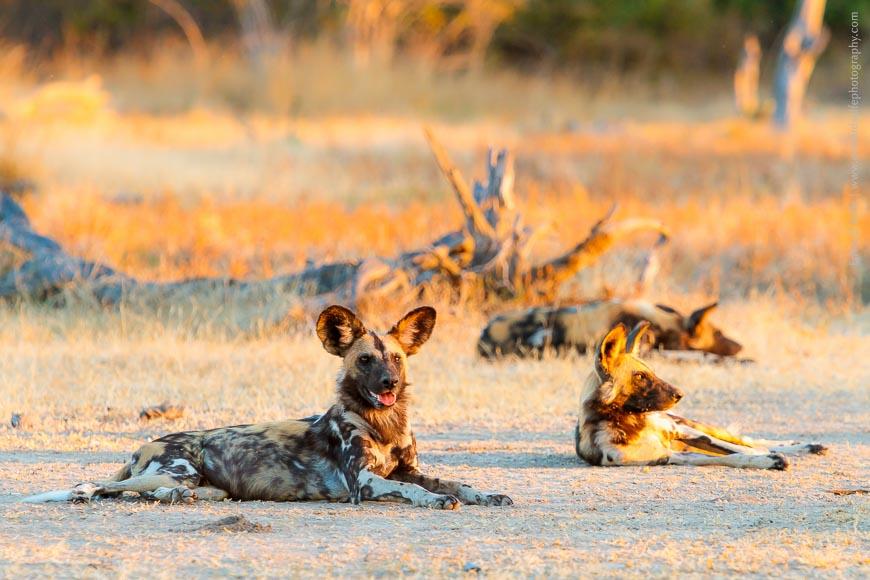
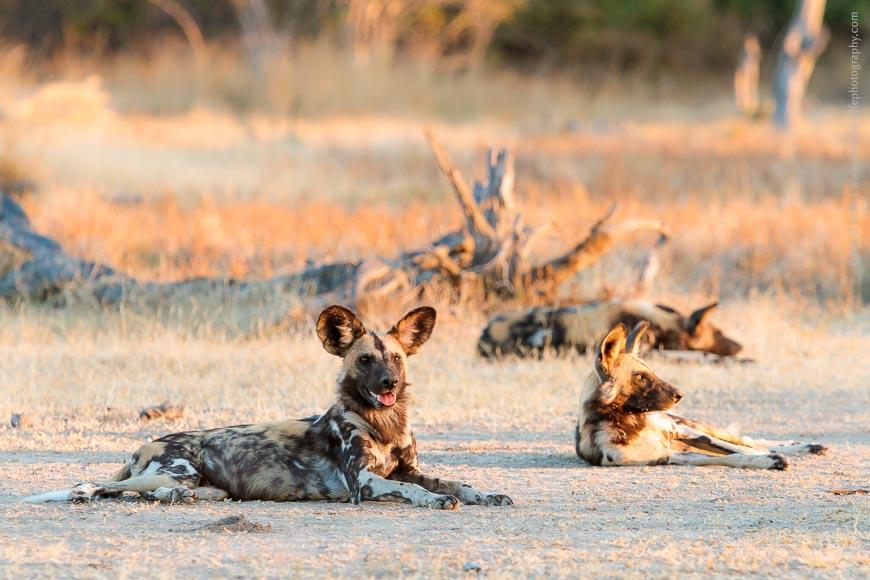
It’s easy to get a little carried away with some of the adjustments and perhaps go too far. We have all seen images where the colour saturation has been over-done and the image speaks more of the work on the computer than the work of the photographer.
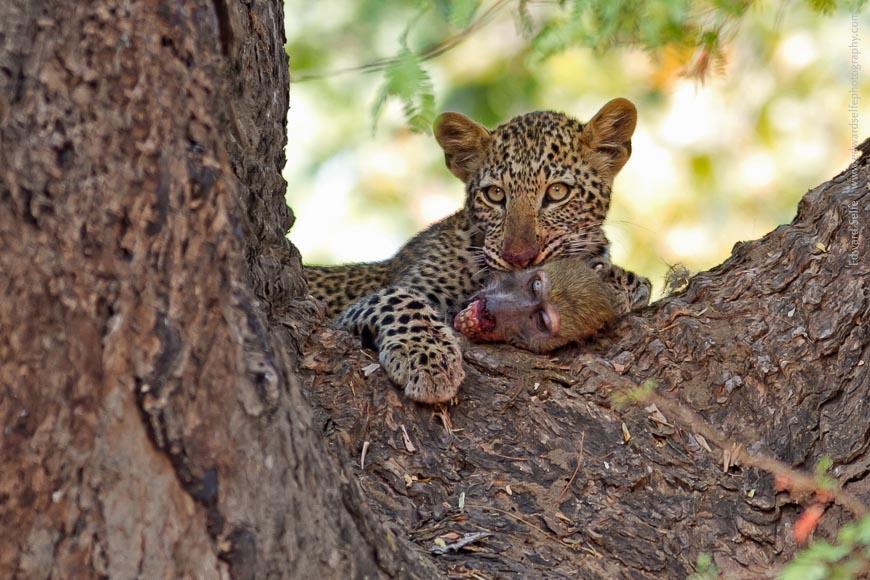
Certainly with wildlife photography, I feel that the purpose of photo-editing is to tweak images to get back to what you saw, not to generate something un-real. Here are comparisons of two images processed in two ways; one of each has been taken a little far (right).
Ideas:
- When you make an adjustment in Lightroom, hold down the shift key before dragging the slider; this will slow down the rate of movement of the slider allowing more accurate adjustments.
- Always compare back to the original image (in Lightroom, you can use the \ key to toggle all adjustments on and off, or simply double-click particular sliders to return them to zero). This will ensure your adjustments are in keeping with the original shot – it’s easy to lose track otherwise!
- If your image is a bit flat, careful use of the colour Saturation slider can help. But this is a blunt tool (affecting all areas of the image) so use it with care. Usually better is the Vibrance tool which boosts weaker colours in your image more than the stronger colours.
- Look very critically at your image. Is this realistic? Is this the impression you want to create? It’s easy to add small tweak on top of small tweak and end up miles away from the starting point.
3. Be careful with the Shadows slider
This slider is perhaps the most easily/commonly over-used of all. Not all great sightings occur in great light and our cameras often give images with harsh dark shadows (cameras cannot “see” the range of tones that our eyes can so we get areas of dark blacks and bright whites when the light is bright).
The best way to avoid needing the shadows slider is to ensure that your image is – if anything – slightly over-exposed, rather than under-exposed. This is a concept knows as “Exposing to the Right [of the Histogram]”. But if you do have to recover the shadows, make sure that it looks realistic and doesn’t give the famous “real-estate brochure effect” where all dark areas have been brightened, all light areas have been darkened and the colours are boosted too far!
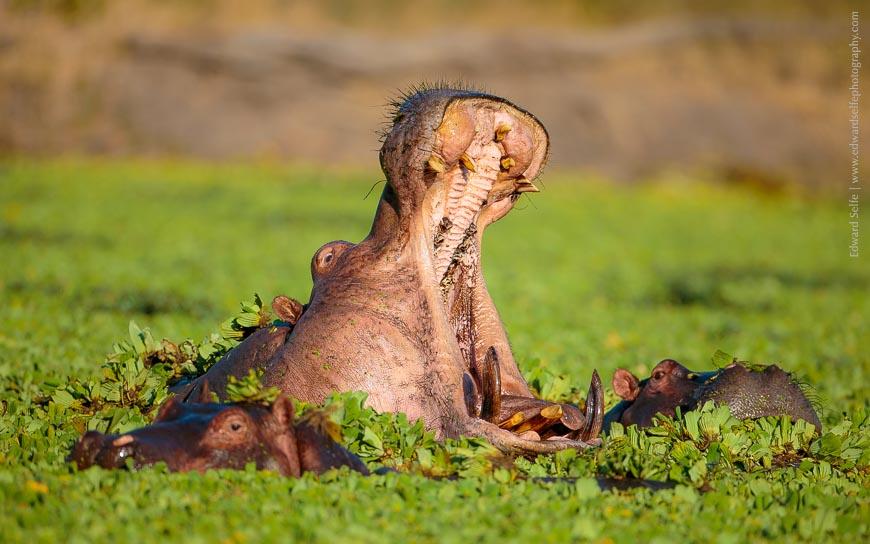
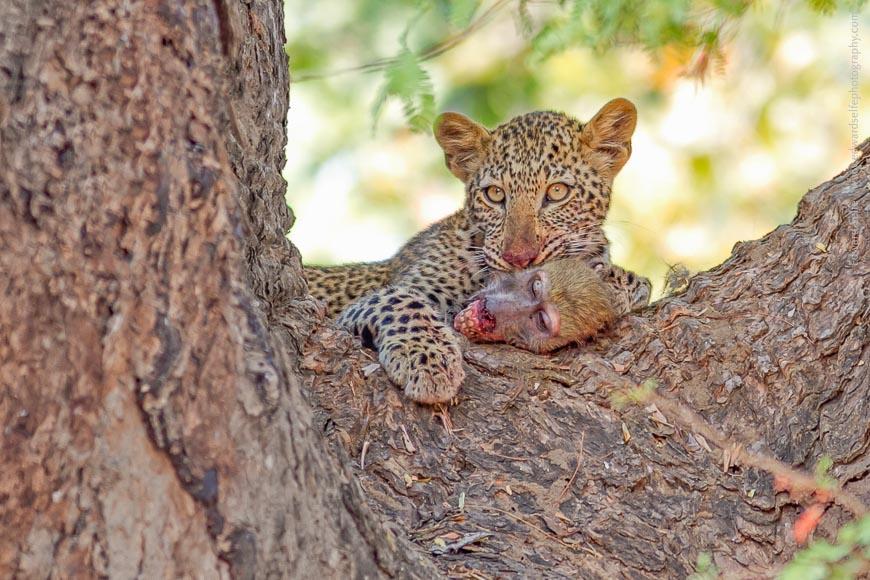
Again, here is a shot with a true-to-life (left) version and a version where I’ve pushed the shadows a little far (right):
Ideas:
- It’s easy to say when I have lots of opportunities to take photos of wildlife, but, I’m going to say it anyway! If an image needs more than a few tweaks in Lightroom, it’s probably not going to be recoverable. To me, editing should be about polishing the original image, and I usually ditch an image if I can’t tweak it in 30 seconds or so. That’s not to say that you shouldn’t spend time on your images – particularly if you are starting out – but try to use the sliders to ‘finish off’ your image rather than apply large-scale adjustments. It will look more realistic that way.
- The shadows slider is a risky tool. Use it carefully. I often find that if I’ve boosted the shadows, I need to drop the blacks slightly to compensate and avoid an unnatural feel.
4. Don’t try to do too much at once!
This is a short point, but worth saying. Once you’ve worked on your screen for 30 – 60 minutes, you’ll probably find you start to lose grasp of what is ‘real’ in terms of colours and tones. It’s worth taking a break and letting your eyes adjust to the normal world. Then return to your screen and try again.
Ideas:
- Work in batches of images. Work on all your images of lions, and then all your images of deer, and then all your images of a landscape from a particular viewpoint. I find it very hard to keep perspective and reality when I am jumping from subject to subject, as is often the case if I work chronologically through a day’s safari images.
- Take regular breaks!
- Try to keep the lighting in the room where you work constant. It’s hard to do, as few of us have bespoke studios, but attempting to do so will help you compare images side-by-side.
5. Return to your images after a few days
This is probably the most important point. It’s a good idea to come back to your images a few days after you’ve completed work on them. A bit of time away from them (especially if you have 5000 after a safari tour!) is useful to regain perspective. I would especially recommend this before submitting images to a client.
Ideas:
- Coming back to images after a couple of days will help you to look at them with fresh eyes.
- From the moment that your image appears on the back of the camera, it’s yours. And like a bit of your own art, it’s hard to view it from a stranger’s perspective. Leaving it for a while and then returning gives you the chance for the “wow” effect once more, or to tweak things so that it achieves the effect you want.
This entry into my blog is a bit more dry than my usual offerings, but I hope it helps those who are processing images back home after the long safari season! Send me any questions you have, and I’ll answer in the comments section below. Thanks!