Whether you use an iPhone, a point-and-shoot, a film SLR or a top-of-the-line digital SLR, the camera creates an image using a combination of 3 variables. These three variables combine to control the amount of light that creates the final image.

THE THREE VARIABLES
These three variables are the Shutter Speed, the Aperture and the ISO/Film speed. Let’s look at each of these in turn.
1. The Shutter Speed (S) might more correctly be called the Shutter duration, since it refers to the length of time that the camera allows light to enter and create the image. This variable is measured in seconds, or fractions of seconds, such as 1/60 sec or 1/2000 sec. The longer the S the more light enters the camera.
2. The Aperture (A) is the size of the hole that the lens creates when the image is being taken. The size of the lens aperture is variable and controllable by the user. This is measured in f-stops, such as f2.8, f5.6 and f11. The wider the aperture (indicated by a smaller number), the more light enters the camera.
3. The last variable is a little more complex because it refers to the sensitivity of the sensor (or film) to light. This is measured in ISO/ASA such as ISO 100, ISO 400, ISO 1600. Higher numbers indicate the sensor is more sensitive to light, so the less light is needed to make the image.
When you set your camera to AUTO, the camera looks at the scene, measures the light and gives you an image which is correctly exposed (not too light or too dark) using a combination of these three variables.
BALANCING THE THREE VARIABLES
To get a correctly exposed image, we need to choose a combination of these three variables that will give us an image that is not too bright or too dark. There are endless possibilities – we can choose a wide aperture and a short shutter speed, or we can choose to close down the aperture (letting in less light) and open the shutter for longer. Or we can maintain a fast shutter speed with a small aperture by increasing the ISO to make the sensor more sensitive to light.
So why don’t we just allow the camera to choose the settings and forget about all this!?
CREATIVE IMPACT
As well as being a control on the amount of light entering the camera, and therefore the brightness of the image, these three variables also have creative impact on the final image.
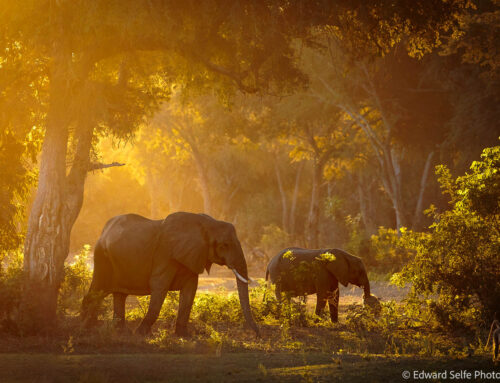
S – controls the amount (or lack) of blur in the image. To get a sharp image a minimum shutter speed is required – for flying birds this will be in the region of 1/3200sec, but for static animals you only need enough speed to ensure you don’t get camera shake (introduced by your movements during the exposure) such as 1/320sec.
A – aperture has the most creative impact. As well as allowing in a lot of light, a wide aperture (f2.8, f4, f5.6) gives only a very shallow depth of field – the distance in front and behind the focal point that is also in focus. A small depth of field can be used to isolate a subject from its background, whereas a larger depth of field will show the animal in its environment.
ISO – ISO has little creative impact, unless you count the digital noise that is visible at high ISOs as creative! ISO’s role in photography is to force the camera to be more sensitive to light at times when there is little light available, or when we cut the light heavily by using a small Aperture.
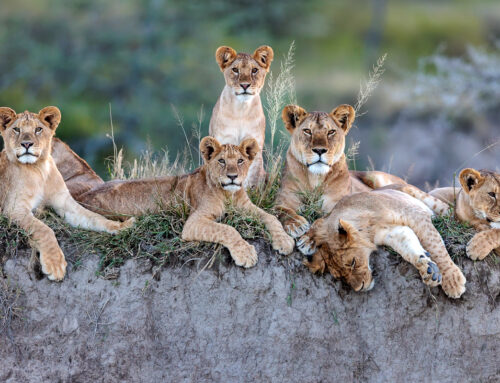
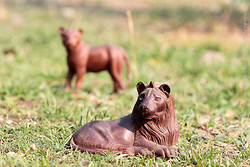
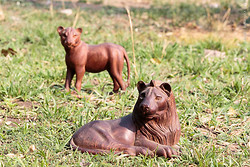
These two images show the effect on the final image of using a wide aperture (left) compared to a smaller aperture (right). No lions were harmed or coerced in the making of these images.
A FRAMEWORK FOR WILDLIFE PHOTOGRAPHY – there is a lot to think about when photographing wildlife, so many wildlife photographers choose to simplify the process where possible.
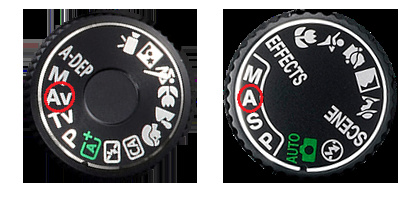
The preferred setting for many is Aperture mode (marked A or Av depending on your camera model). This mode allows you to choose the aperture you would like, and (based on your chosen ISO) the camera will calculate the shutter speed that is required to give a correctly exposed image.
THE PROCESS – based on our decision to use A priority mode, we follow the following process. For wildlife photography, we usually want to leave our aperture at its widest setting to allow in as much light as possible, and to enjoy the isolating effect that it has on our subject.
– Set the Aperture to the widest available – f2.8, f4 or f5.6
– Lift the camera and point towards your subject.
– Assess the Shutter speed – if suitable, take your shot; if not, adjust your ISO up or down.
If you want more depth of field than your widest aperture gives you, then simply dial in the required Aperture and repeat the process above.
THE BENEFITS
This framework allows you constant control over your depth of field (using the main dial on your camera) and very quick adjustment of the shutter speed (using the ISO). The actual value of the ISO becomes irrelevant; it is simply a tool that you use to control the Shutter Speed. If you want more speed, you have to add more light, or increase the ISO. If the shutter speed is higher than you need, reduce the ISO to improve the image quality.
SHUTTER SPEED SUGGESTIONS
Above, I said that you needed to assess the shutter speed, and decide if it was fast enough for your subject. But what speed is fast enough!? It varies – of course – between subjects and what effect you are trying to achieve. Below is an indication, starting with the lowest speeds, of what shutter speeds you will require for different subjects. This assumes that light levels are not a limiting factor; in low-light situations, you will have to accept lower shutter speeds to avoid increasing the ISO to unacceptable levels:
– 1/20sec for panning shots to introduce motion blur to your image
– 1/100sec for static scenery with your camera well supported
– 1/250sec for unsupported, handheld scenes
– 1/320sec for static animals
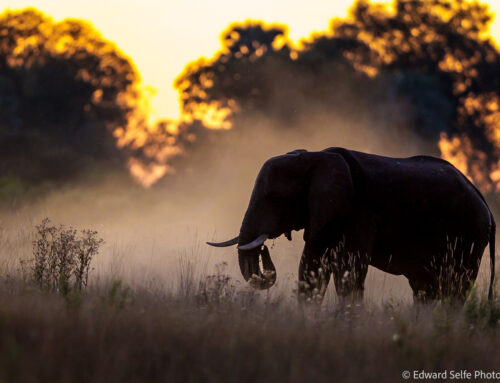
– 1/500sec for elephants and other large animals
– 1/800sec for antelope (who are always moving and twitching!)
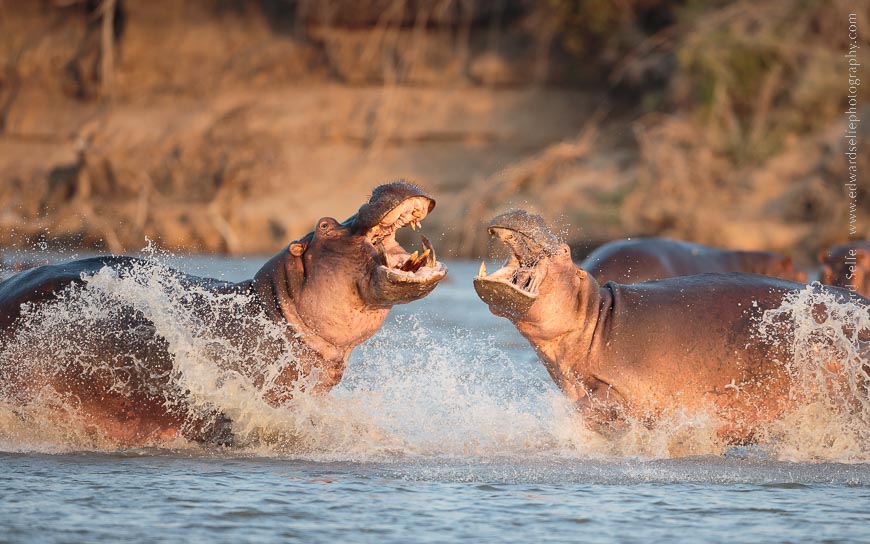
– 1/1000sec for fast moving animals
– 1/1600sec for birds perched
– 1/2500sec upwards for birds in flight to freeze wing movements
This is a long explanation, but it covers a lot of ground. I use this framework on my cameras for wildlife, weddings, lodges and everything that I do. It takes one of the variables out of the equation and leaves you to balance control your Shutter Speed with your ISO. It’s fast, convenient and, if you adjust your ISO continually as the lighting conditions change, you’ll be ready for unexpected action at any time!
Good luck, and please post any questions in the comments below.