I wrote some time ago about one of the reasons that photos taken with a dSLR might not come out how you imagined them when looking through the viewfinder. Before reading on, it’s probably a good idea to read the following two articles:
I regularly chat with guests about the lighting on subjects, helping them to predict when exposure compensation (intentional over- or under-exposing an image) may be required. And it’s probably more than you think; after adjusting my focus point in the frame and changing the ISO to accommodate changing light, exposure compensation is the function that I use most often.
Exposure compensation will likely be required whenever there is a significant difference in brightness between your subject and its surroundings. Think for example of a bird sitting on a branch against a bright sky; or an antelope that is being lit by afternoon sunlight but the surroundings are in the shade of over-hanging trees. In both these scenarios, the subject (the part we care about) is differently lit than the surroundings.
In the blog posts above, I talked about why the camera will produce an image which is incorrectly exposed in these situations. But in summary, it’s safe to say that if the background is much lighter or much darker than the subject, it has a large impact on the camera’s metering, and biases the final result.
I was explaining the concept of exposure compensation to one group, and I came up with the idea that over-exposure is a corrective tool and under-exposure is a creative tool. It seemed to help them understand the concept, so I thought I would share it here too.
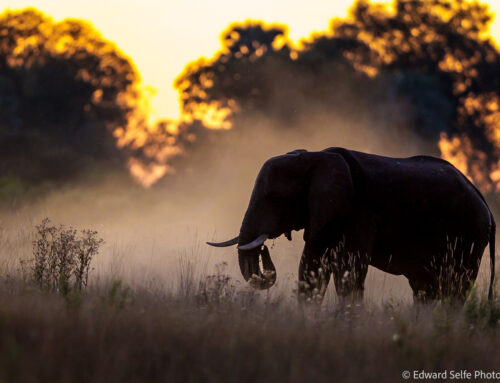
Over-exposure may be required when subject in your image is darker than its surroundings. The reason for this is that the camera “sees” the large areas of bright light behind the subject and this causes the camera to produce an image that is darker than you need; the sky/background will be correctly exposed, but your subject will be too dark. This is most often seen when shooting a subject against a bright sky, where we could consider that the subject is partly “silhouetted” against the sky. [Not to be confused with an intentional silhouetted shot where we expose for the sky and place a recognisable silhouetted shape against it.]
In this case, the over-exposure required is corrective, to ensure that the subject is correctly exposed. The reason that I say it is corrective is that it is not a technique that we usually use for creative effect, but rather to give us an accurate rendition of our subject.
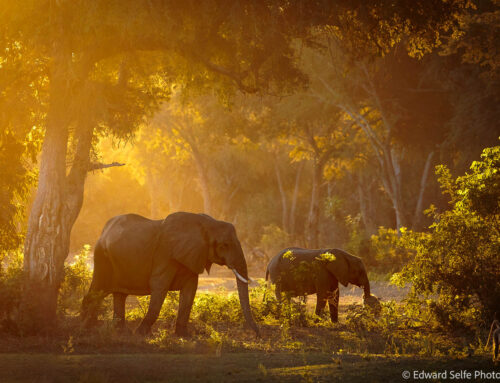
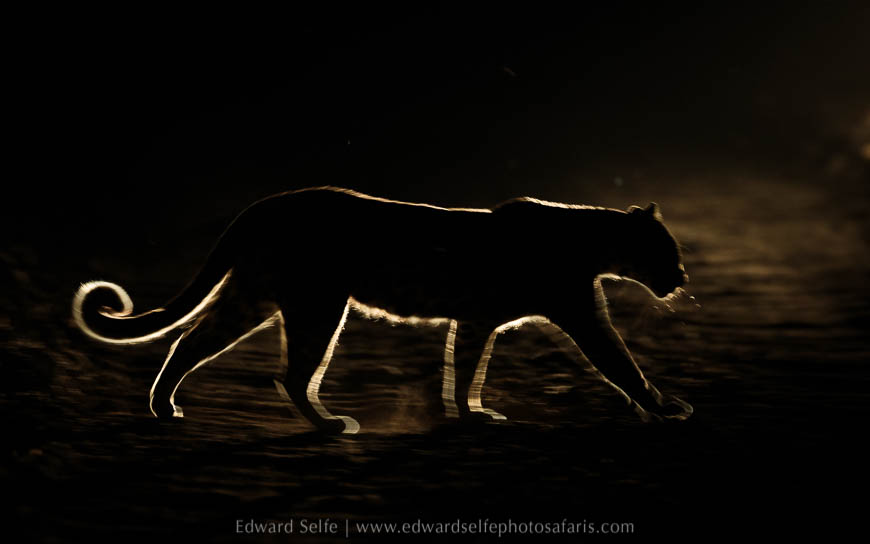
Conversely, I think that under-exposure is a tool that can be employed to generate images with incredible impact. Situations which require under-exposure will occur when the subject is lighter than the background/surroundings. This makes for a much more powerful shot, since our eye is always drawn to the brightest part of an image. This easily occurs in the early morning, where shafts of light probe through the trees illuminating some areas of a scene but leaving others in the shade.
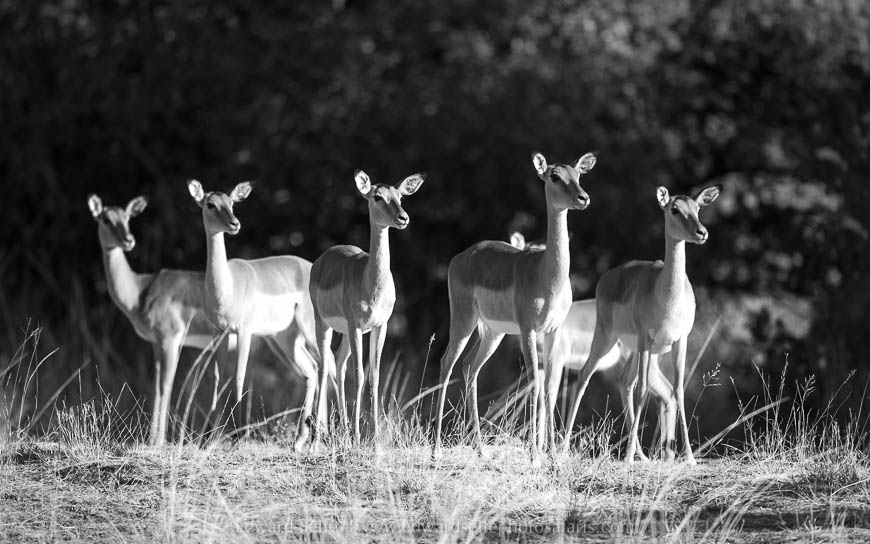

In both these cases, the image is all about the differential light. These are relatively simple shots of impalas and giraffes. The giraffes are splashing through the river which is interesting, but the impalas are simply looking in one direction. The light is what makes the impala image.
Consider this image; what is the subject?
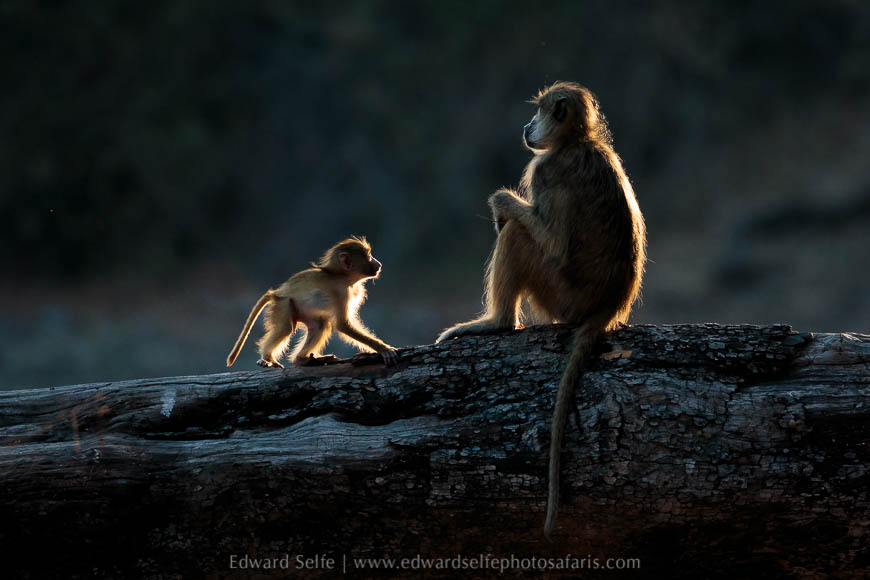
Yes, the subject is the baboon, but actually the subject is the rim-lit furry edge of the baboon. We are not worried about the side of the baboon which is facing us or the background behind, but we want to make sure that the hairy edge contains detail and is not over-exposed. Therefore, this becomes an image where our subject (the hairy edge of the baboon) is much lighter than the surroundings, so it’s also an image that requires under-exposure….of -1 in this case….and we end up with a very striking image.
So how much under- or over-exposure might we use? It depends on the scenario. But given that under-exposure is a creative tool, I have sometimes employed -2 or even -2.3 to give a very strong effect when the subject is a small part of the frame.
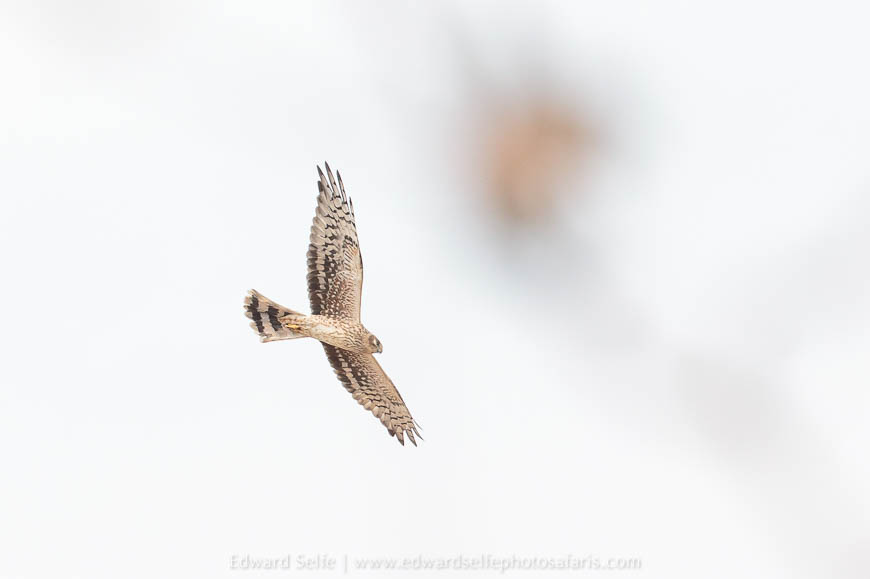
However, over-exposure is a corrective tool, so I find that if I need more than +1 to give me correct light on the subject, the image is probably too “poorly” lit to be worth taking (unless, of course, it’s a once-in-a-lifetime moment!). That was the case with this Pallid Harrier shot – I had not seen one before I wanted a record, so I shot it at +2.3; the results are not very pretty, but it works as a record. If you find yourself needing +2 or more to get a correctly exposed subject, you probably need to move your position relative to the light, or come back when the light is softer as the results will often be poor.
In summary, whenever there is differential light on your subject and your background, you’ll need to consider whether to underexpose or overexpose. If you see a situation where the subject appears dark against the light background, you’ll likely have to over-expose. When you see your light subject popping out from a dark background, recognise the great opportunity that offers, dial in some negative exposure-compensation and watch as your subject emerges from its surroundings.
As always, any questions are welcome in the section below!