The idea of a panorama is to take multiple overlapping images of a scene and then stitch the edges together using software to generate one large photo of the whole scene. In the past, this used to be a very tricky technique which involved clever use of layers and transformations in Adobe Photoshop. The latest editions of Lightroom now contain this functionality within the program itself – more on this later.
So, when might you want to make a panorama?
1. Your lens is too long and you cannot fit the whole scene into one shot – stitching together two or more images allows the whole scene to show in one frame.
2. You wish to maintain the shallow depth-of-field on your subject – keeping your lens at a longer focal length reduces the depth of field.
3. You wish to maximise the number of pixels on your subject – using more than one full-size image to make up your final photo increases the number of pixels and therefore allows you to make larger prints.
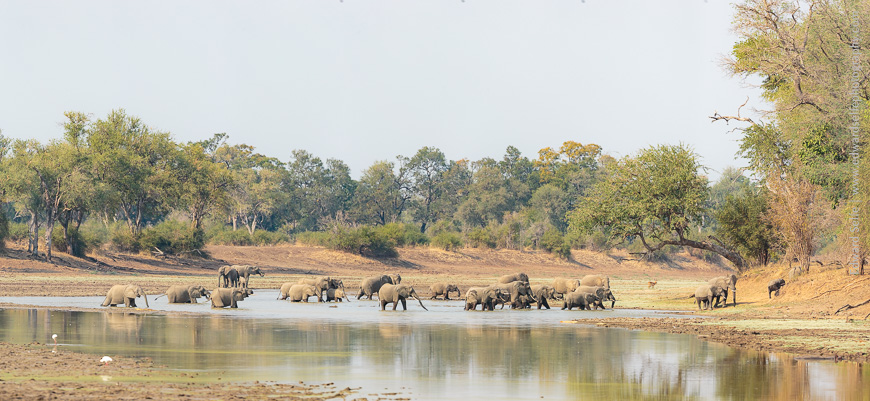
An example: Elephants Crossing Lunga Lagoon I created this panorama image using 10 stitched images from a 500mm lens. I could have reached for a wide-angle lens (a 100mm lens would probably have worked, but the perspective generated by a 100mm lens would have been far less flattering; the elephants would have been smaller in the frame, the background would have been much more in focus (because the depth of field at 100mm is much larger than at 500mm) and the overall effect would have been much weaker.
The resulting image, after being stitched together, is 11,000 x 5,000 pixels which is dramatically larger than the 5184 x 3456 pixel image that I would have had if I’d used the 100mm lens and a single frame.
So, in this case, the benefits were two-fold: I maintained the compressed perspective which long telephoto lenses generate, and I also created an image which could be printed much larger than anything taken with one frame.
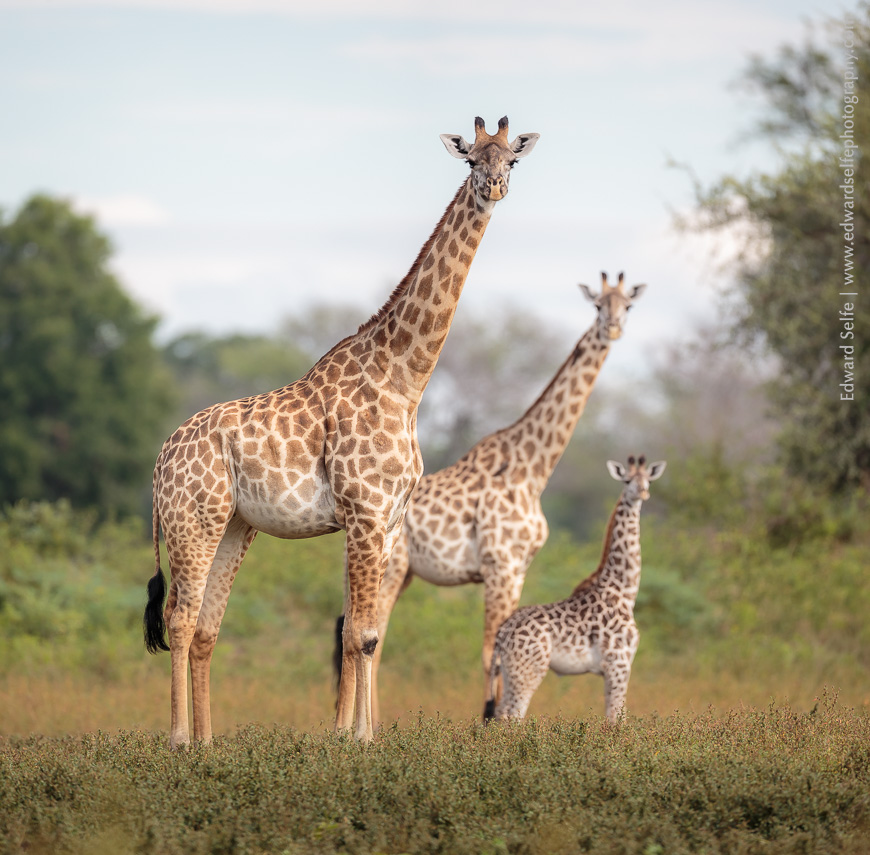
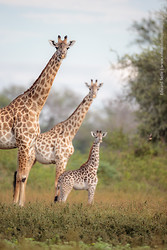
A second example: Giraffe Trio I took this image of three giraffes near my home. I was sitting on the ground and the giraffes were moving around nearby, constantly giving me new and interesting composition options.
When I saw this composition appear in my viewfinder, I knew it would make a beautiful shot, but I immediately saw that I could not fit the whole scene into one frame – I had either to cut off legs or the edges of their bodies – so I quickly arranged to do a two-shot panorama-stitch.
The Theory: Lock Exposure and Focus between shots When taking panorama shots you must ensure that the focus and the exposure are the same between all the images so that they match up when they are blended. It’s easy to see that if the closest giraffe was the point of focus in the first image, and the furthest giraffe in the second image, the two half-images would not match. Equally, if the left-hand image was lighter or darker than the right-hand image, they would not match either!
The Practical: First you need to choose what will be the focused subject in your frame. In my image above, it was the closest giraffe. So I pointed the camera at that giraffe and focused carefully. Without moving the camera, I locked the exposure (using the * button on the top right of the camera) and locked the focus (using the AF-ON button – read more about this).
I then moved the camera to the left and took my first shot, ensuring that I left enough space around the subjects. I then panned to the right – trying to keep the camera level – and took my second shot, ensuring that I had some overlap between the two images. In other situations, it might take 3 or more shots to include everything that you want, but the principle is the same. It’s really important that you don’t re-focus or un-lock the exposure during this process. The focus distance and exposure settings should be identical for all images.
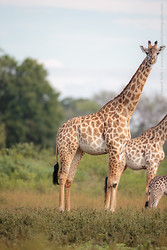
The image above was two horizontal (landscape) images stacked one above the other.
The Panorama Merging: After importing your images into Lightroom, you can apply initial adjustments to the RAW files, including exposure, highlights, shadows and colour correction, but ensure that you do exactly the same to each – Lightroom has a useful synchronisation function which allows you copy develop settings across multiple images. I would suggest that you leave noise reduction, sharpening and certainly cropping until after the merging process.
Select all the images that make up your panorama, and then choose “Photo > Photo Merge > Panorama” from the menus at the top. You can also use Ctrl + M. A pop-up window will guide you through the rest of the process. After the software has generated your image, you can apply final edits, noise reduction, cropping and sharpening.
Things to watch out for:
– take care to pan carefully between shots to ensure that your resulting image is level and not dropping away on one side.
– it’s not advisable to use a polarising filter when making panoramas as they create uneven blues in the sky which often show up on merged images
– make sure that there is minimal movement of the subjects in your scene to avoid problems with the merging. If there is movement, try to capture the moving subject in only one frame of the series.