We are all looking for sharp photos and the pursuit of this goal dominates many discussions on online blogs as well as in the back of safari vehicles! There are two factors that heavily influence the “sharpness” of an image: shutter-speed and focus. Since we all strive for sharp pictures (most of the time) it’s very important to understand these two variables and know how to set up your camera.
Shutter speed: images that are taken with a shutter speed that is too slow for the situation will record movement as blur. This blur can be the movement of the camera (if not supported properly) or movement of the subject itself. Getting sharp images by maintaining an appropriate shutter speed is discussed at length in my blog about camera settings for safari photography.
Focus: it is also crucial that you achieve accurate focus on your chosen subject at the moment that you trigger your shutter. Modern cameras are extremely good at achieving focus, but in the complex environment of safari, with bushes, shrubs and trees competing with your subject for the camera’s attention, choosing the right settings to assist the camera is crucial. Before reading on, you might wish to refresh your memory by reading this short blog about focus.
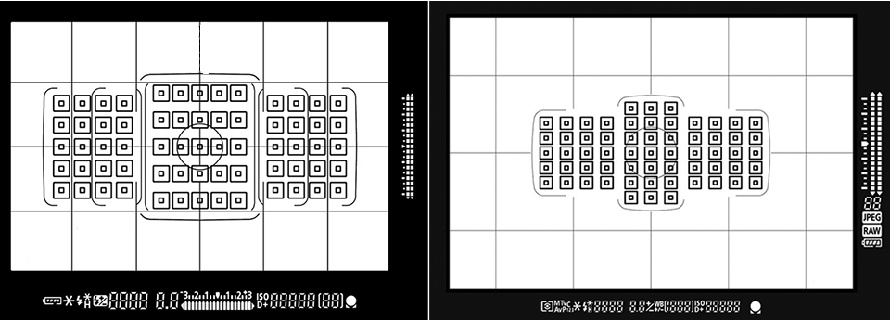
Most dSLR and bridge cameras give a choice between using a small focus area (a single focus point, indicated in the viewfinder by a small square, rectangle or dot) or allowing the camera to choose what to focus on based on its own calculations. Allowing the camera to choose is risky since cameras cannot (yet) differentiate between animals, trees, grass and soil! Therefore, selecting a single focusing point and composing your frame so that the focus point is over your subject is preferable to giving the camera complete autonomy.
However, selecting a single focus point in the middle of the frame (the default position) prevents you composing your image with the subject anywhere except the middle of the frame. When you want to move the subject away from the centre, it becomes important to know how to move the selected focus point around in the frame.
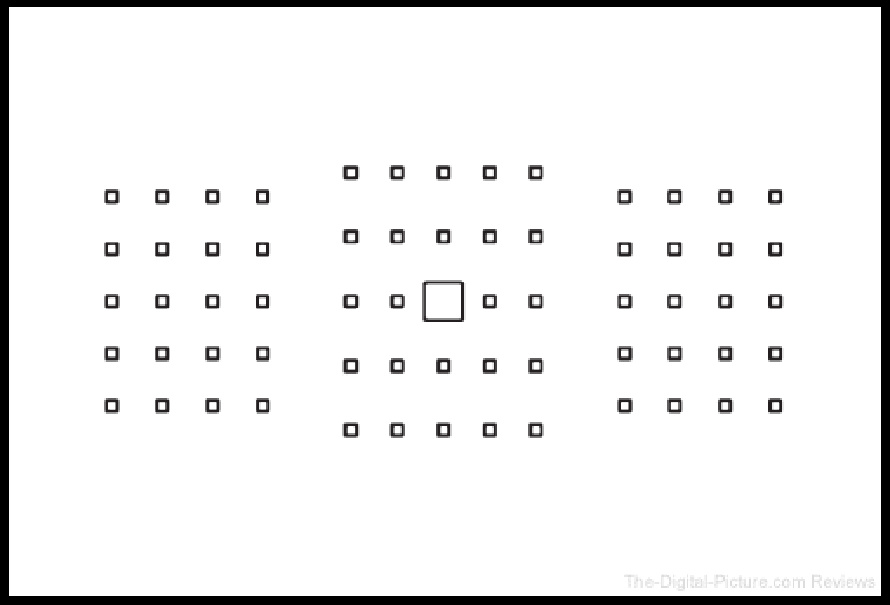
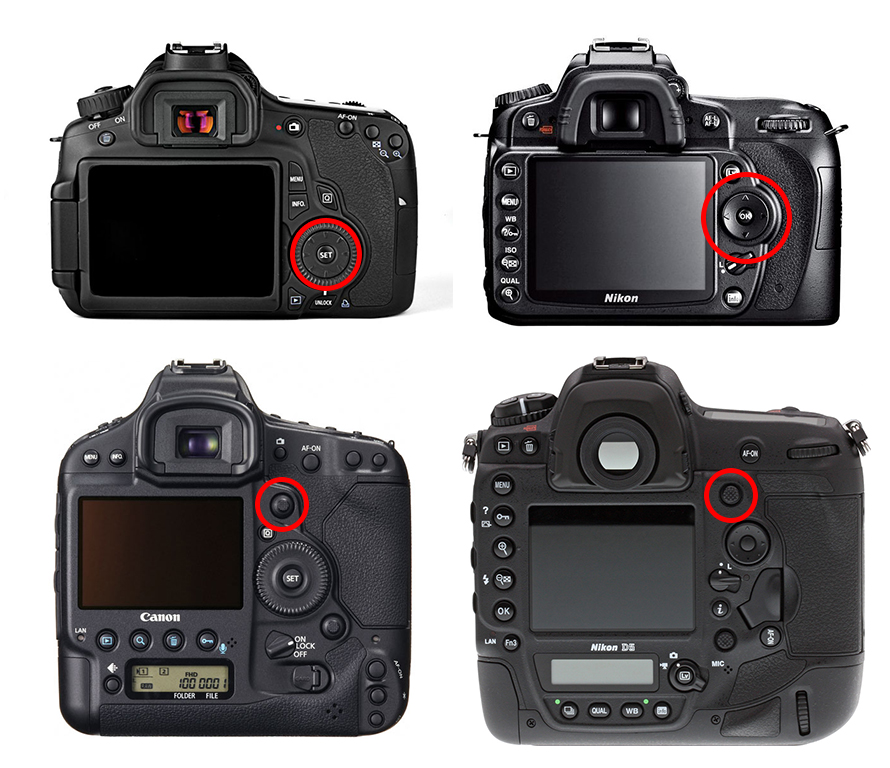
Cameras vary in the way they execute this function, but most offer a 4-way controller or joystick which allows the user to move the selected focus point (the small square) around in the frame. Depending on the camera, it will be possible to move this point across some or all of the area of the frame. Once you have moved your focus point to your preferred position, you can take your photo, composed with the subject in your chosen part of the frame.
At this point, we need to look at the two different focusing modes available: AF-single-shot and AF-continuous. In AF-single-shot mode, focus on your subject is achieved with a half-press of the shutter button, and then locked until the shutter button is released and re-pressed. In AF-continuous mode, the camera continually keeps in focus whatever part of the frame is covered by the selected focus square. Canon, Nikon and Sony all have slightly different names for these but all offer the same functionality.
Many people avoid the need to move the focus point around the frame by using a technique called focus-and-recompose. Using AF-single-shot, they place the middle focus point over the subject, focus by half-pressing the shutter button, and then recompose the scene while holding down the shutter button, then finally taking the shot. This will work some of the time, but will not work if your subject is moving towards you; in the time taken to focus, move the frame and take your shot, the subject will move closer to you and be out of focus. This method can work for static subjects and for subjects which are crossing perpendicular to the camera.
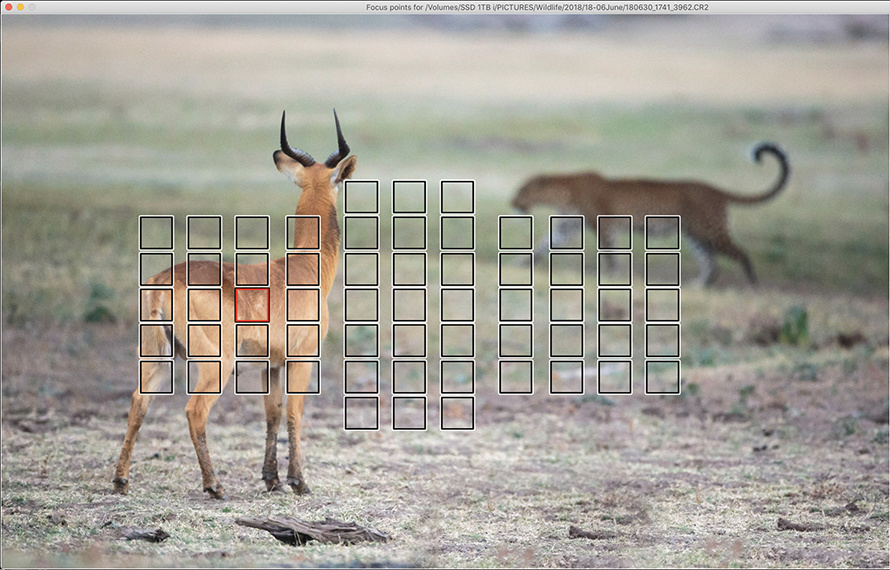
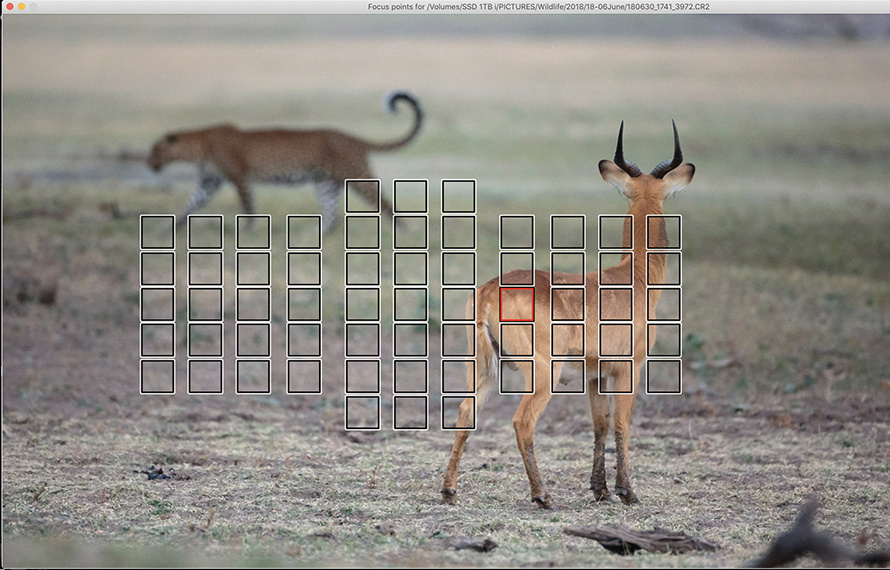
So, for the best results, users should choose AF-continuous mode and move the focus point across the frame so that it covers their chosen subject at the time that the shot is taken. This is not easy, and takes practice, but to be sure of getting focused images of subjects – whether they are moving towards, away from or across you – this is the only reliable solution. For example, take these two images of a puku and a leopard. Moving the focus point across the frame between shots allowed me to frame two different images in a short time and still keep the puku in focus even as it advanced towards the retreating leopard (increasing its distance from me).
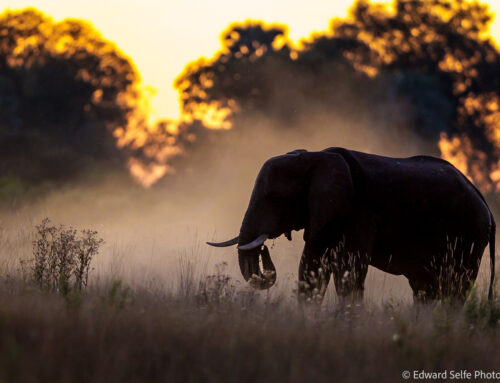
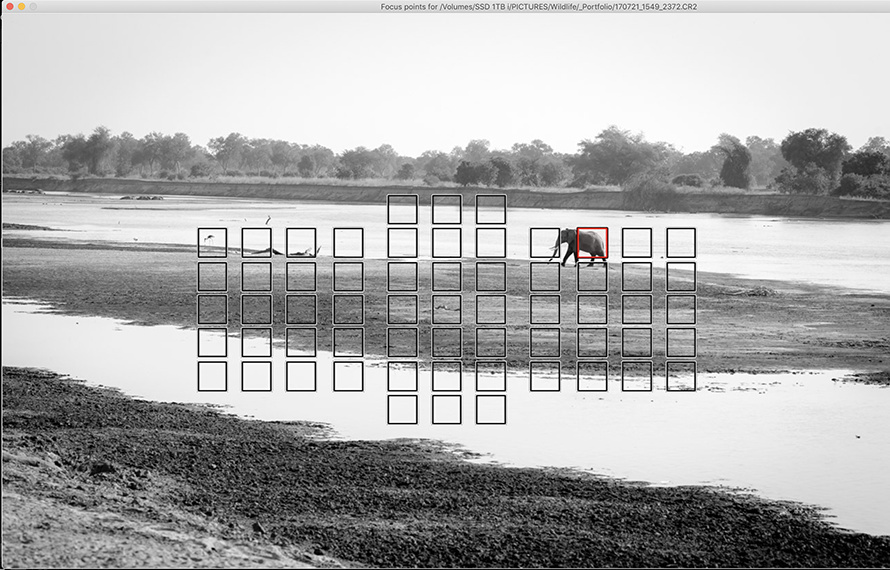
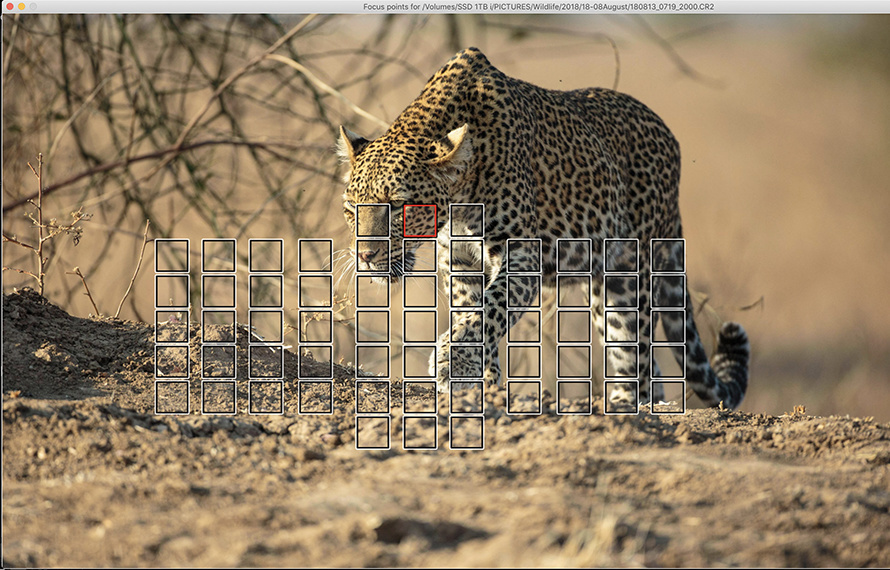
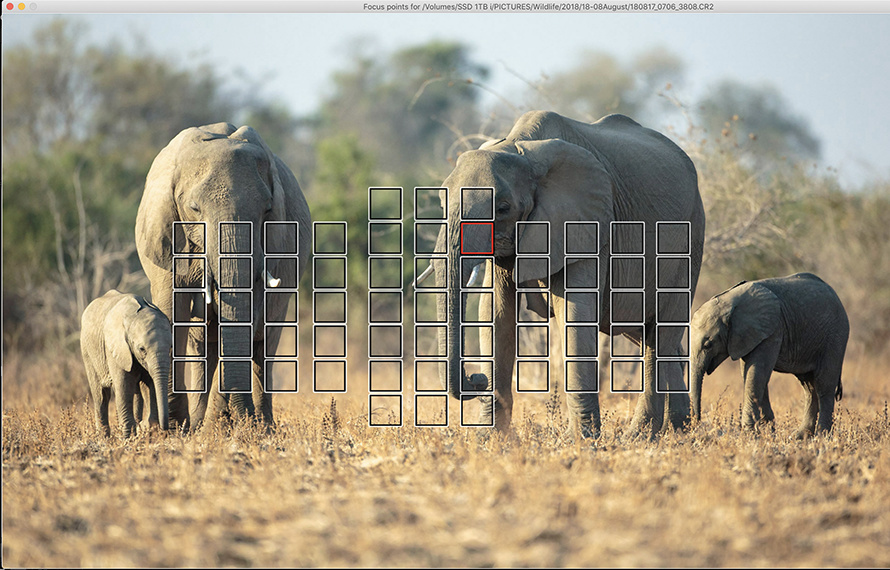
Equally with these images of Olimba the leopard and the elephant herd; choosing a focus point away from the centre and allowing the camera to track focus continually at that point of the frame allowed me to maintain the composition I wanted while keeping the subjects in focus. Both these situations would have been very tricky to achieve with AF-single-shot and the focus and recompose method.
In summary, I would strongly suggest that wildlife photographers use AF-continuous (also called AF-C & AI Servo) for all safari photography, and that they use the camera’s 4-way controller to move the selected focus point around inside the frame so that it covers their subject (or its head/eye) at the time that the shots are taken.
(Note that the concept of back-button focusing, which I don’t use, is separate to this discussion. Back-button focus refers to which button on the camera is used to activate focusing, not which focusing mode is used.)