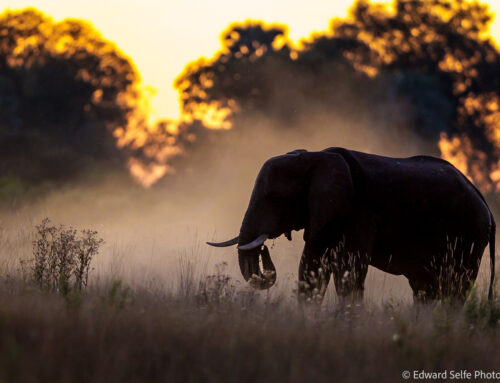
I have been using the Canon EOS R5 for almost a year. I’ve put it through a safari season, with all the associated travel, knocks, bumps and dust which that entails, and I’m happy to say that it’s coped very well. It doesn’t have the ruggedness (some might say brick-like) feel of a 1-Series camera, but it doesn’t claim to, and I enjoy the lighter weight of the camera in my hand. I added the BG-R10 battery pack to mine to give me the portrait grip and to help balance the camera against heavy lenses.
For the most part, I have been very happy with the camera. I’ve loved the real-time preview in the excellent electronic view-finder (EVF), the blazing frame rate speed of the electronic shutter when needed, the impressive auto-focus (AF) and the massive file sizes which make even smaller subjects a viable option for photography with a 500mm lens (and sometimes a 1.4x TC).
Along the way, I’ve learned a few things which I’m sharing here in case they are helpful to others with R-series cameras, or indeed to others using mirrorless cameras….since Sony, Nikon and Fuji (and others) all make excellent cameras whose similarities are more remarkable than their differences. This is not intending to be a comprehensive manual for the R5 – such things exist and several are very good – but simply a few ideas that I have picked up and want to share.
Firstly, of course, more than ever before, this camera is a computer. While with the dSLRs there was still the analogue interaction through an optical viewfinder, the user’s whole experience with a mirrorless camera is digital….and therefore customisable. With this come incredible advantages, and some disadvantages.
1. To me, one of the big advantages of pro-series cameras was the ability to customise their buttons to perform personalised functions. On my 1DXs, I had custom functions set on the MODE, C-Fn., and Q buttons to name a few. The number of buttons was sufficient to handle the range of functions that I wanted to have at my fingertips, so to speak. With the advent of the EVF, the mirrorless technology and, perhaps most of all, the incredible AF system, there are many more things that I want to be able to customise. I have allocated buttons for many of them, but (a) the buttons are smaller since the camera is smaller so it’s sometimes harder to find them and, (b) there are not enough buttons to handle all the options! This is not a complaint!
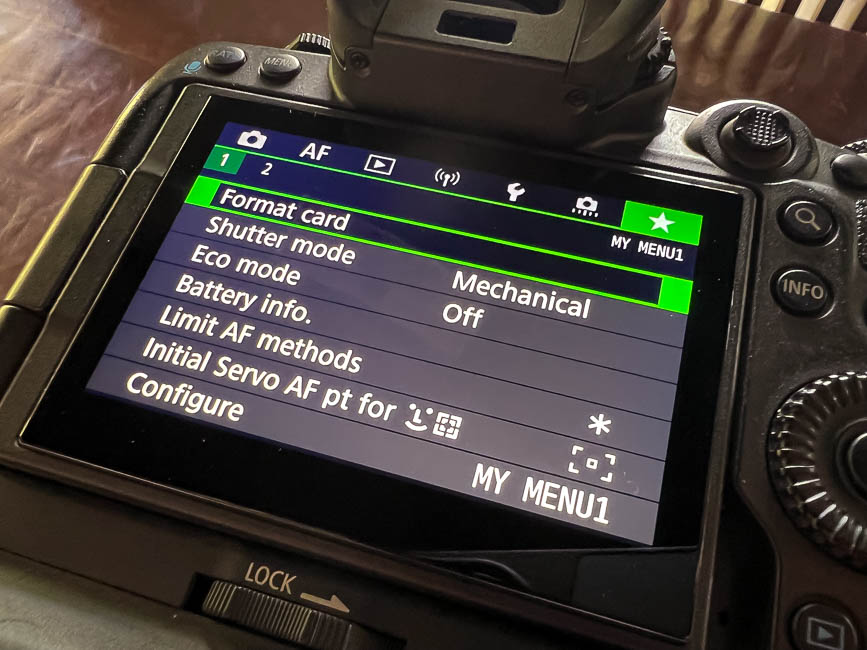
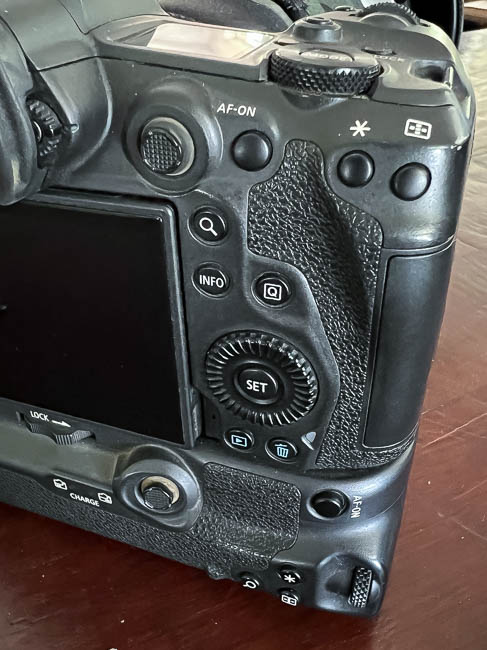
My solution has been to make much more use of the camera’s “My Menu” which allows the user to place a small number of menu options into the green menu page for easy access. Press menu, then Q to toggle between the coloured tabs. I’ll refer to My Menu several times in this post. With the addition of a 3rd “wheel dial” on the R5 (what Canon calls the Quick Control Dial 2) I could repurpose the SET button in the middle of the rear Quick Control Dial 1. I set that button to take me to the MENU, making that accessible using my thumb, rather than having to reach across to the top left of the camera.
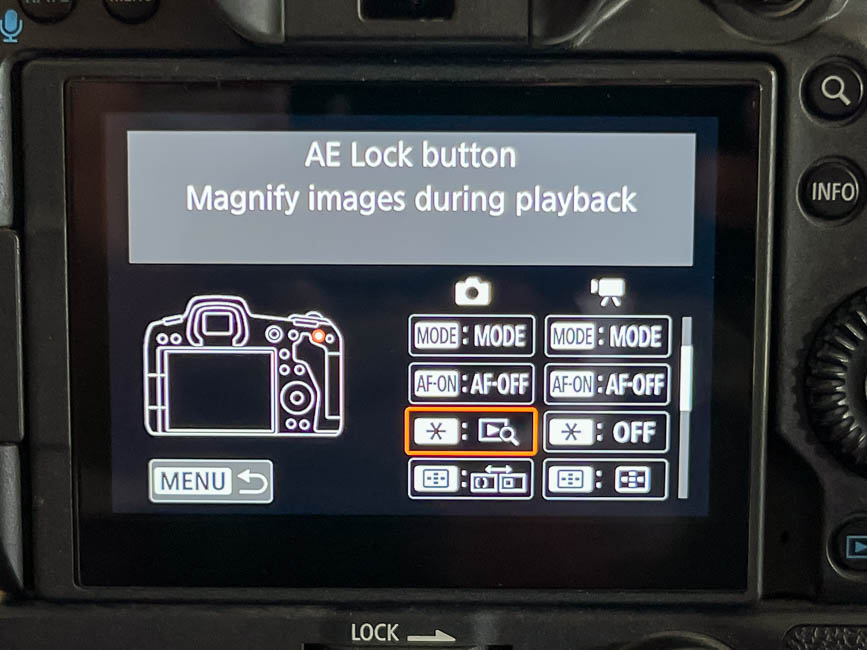
2. One of the great functions of mirrorless is that it (further) reduces the need to take your eye from the viewfinder. Practiced dSLR users could make the necessary changes to their cameras without looking at the camera, but there was still the need to review the back screen to see the final images. Not so with the mirrorless era. While shooting, one can press the Play/Review button on the back of the camera which takes you to the latest frame. One can then press the Magnifying glass button to enlarge that.
When shooting fast, I don’t need to see the whole image that I have just taken, since it looks exactly like it looked in my viewfinder. But I do need to check critical sharpness, so I set the * button (usually used for exposure lock) to “Magnify Images during Playback”. With that enabled, at any time while I’m shooting, I press that button and it takes me to a 100% view of my latest image. I can then rotate the rear Quick Control Dial 1 to scroll through all images at 100% view. I can also tap that * button again to return to full-screen view of the image. One tap of the shutter button and I’m back in shooting mode again.
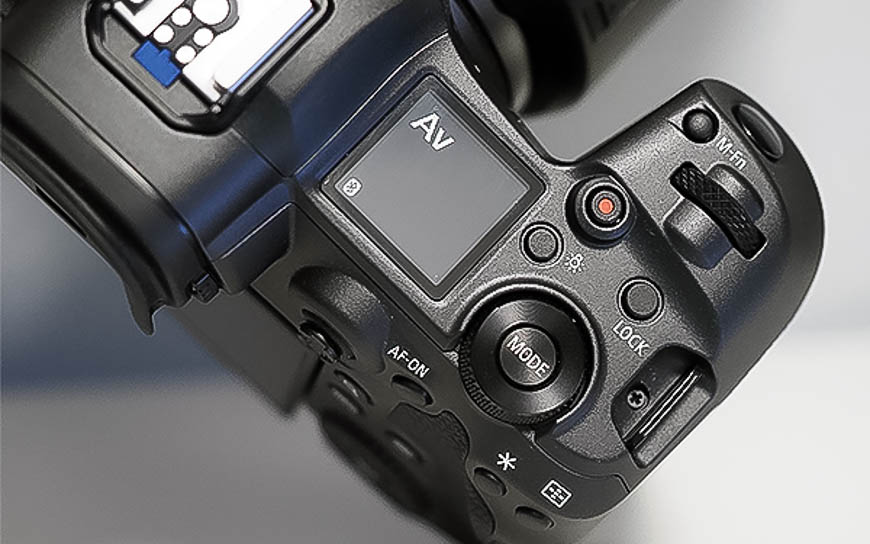
3. As with my dSLRs, I use Custom Modes to enable me to switch quickly between different shooting techniques. You can read more about how I set my cameras up here. Some of this is no longer relevant with the advent of mirrorless, but I still employ the general principle of using the small M-Fn button near the shutter to switch between Av (my normal shooting mode), C1 (a slow shutter speed mode for introducing panning blur, C2 (a maximum speed, high shutter speed, high frame rate mode for capturing action at any cost) and C3 (for night time shooting).
With modern lenses, the R5 delivers 12fps on mechanical shutter mode. This is sufficient for most uses, but occasionally the camera’s 20fps electronic shutter mode is useful. I have a shortcut to that option in My Menu, but that takes time, so I set my normal Av mode with the mechanical shutter, and my high-speed C2 mode with the electronic shutter. This means that, if something happens fast, like it did when Chiphadzuwa attacked a baboon in June 2022, I am ready to capture 20 fps of action.
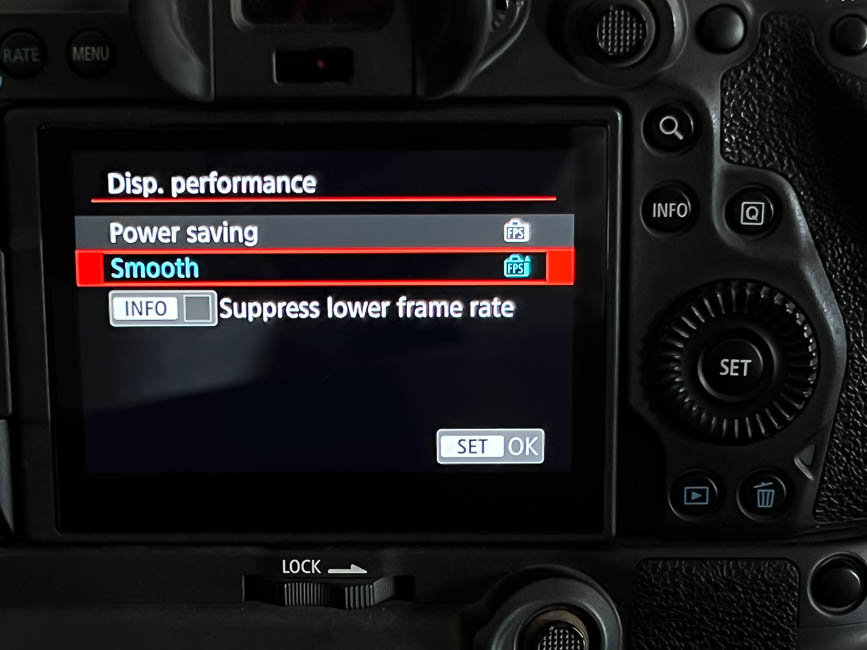
While on this topic, one of the few disadvantages of mirrorless cameras is that achieving good panning blur images is much harder. It’s likely that this is because the EVF is not quite lag-free (like an optical VF is) so it’s harder to track a running subject smoothly. I found that increasing the frame rate of the EVF improves this dramatically, though it still falls short of real optical view. Be prepared to need extra batteries when making changes such as this.
4. The R5 has a phenomenal in-camera stabiliser which complements the image stabiliser in the lens. Together, they usually work very well indeed. However, with an IS lens fitted, the lens’s IS switch controls both the IBIS and the IS. It’s a “neither or both” situation. This shouldn’t be a problem except that I find that my R5 is “on” and metering (and therefore stabilising) much more than my old dSLRs ever did. I suspect that this is because the camera wakes up and starts to meter every time my arm/hand comes close to the sensor below the eyepiece. This can happen a lot when it is laying across my lap.
I haven’t found a solution for this, short of turning off the external screen and using only the EVF (which I don’t want to do) so I have sometimes resorted to turning off all stabilisation. This is not ideal but it’s a workable solution in good light. If anyone has a way to solve this riddle, I’d be happy to hear it.
On the plus side, with the IS off, I have enjoyed amazing battery life from the R5, including several days’ use without a charge.
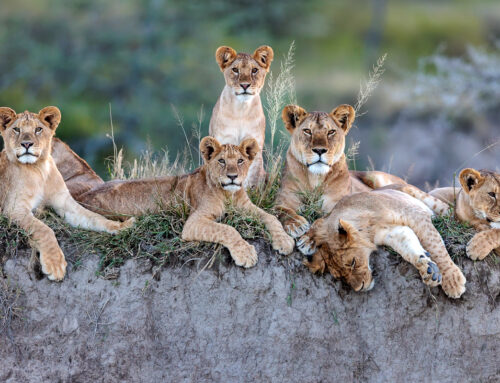
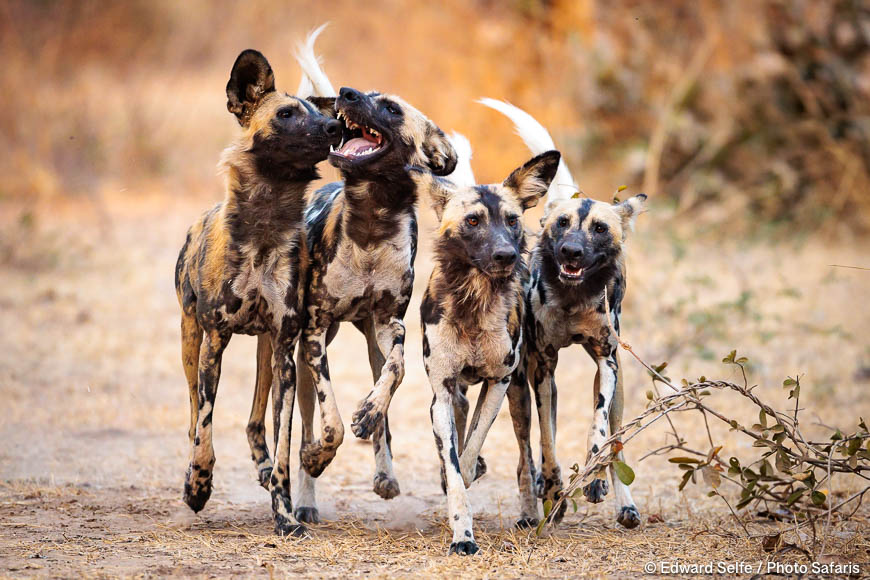
5. Finally, I wanted to discuss some details about the autofocus system. I almost exclusively use AF-tracking with eye-AF enabled. It’s phenomenal; it locates and locks on to eyes within the frame and doesn’t let go. I have been able to capture high-speed images that would in the past have been a bit of hit and miss, such as this image of a group of wild dogs charging towards me:
I find that the AF system’s success rate is increased if you enable the feature that allows the user to “tell the camera” what you want it to lock onto before you start focusing. This is helpful if you want to use eye-tracking but you don’t want to give up total control on which eye the camera should focus and lock onto.
This setting can be controlled with the “Initial Servo AF Point for eye-tracking” function:
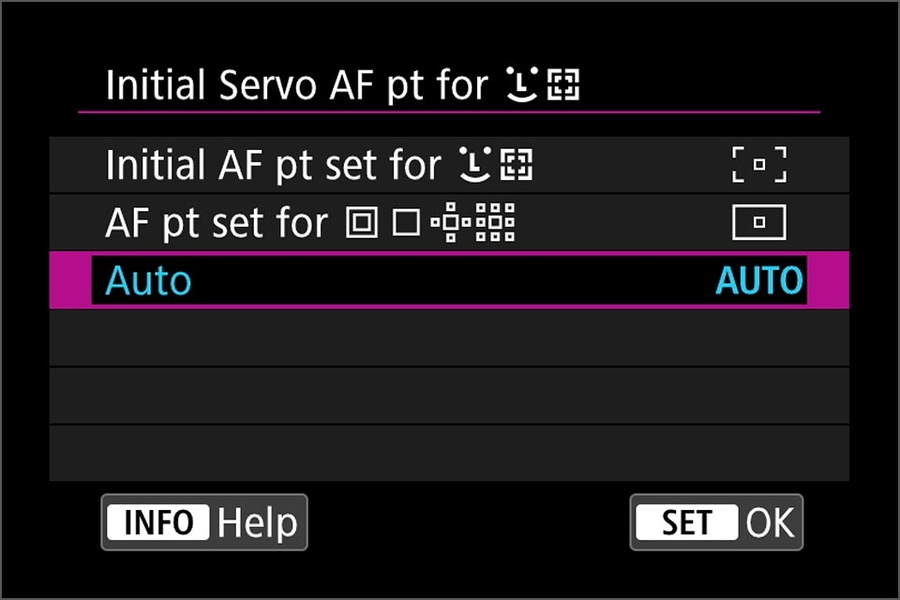
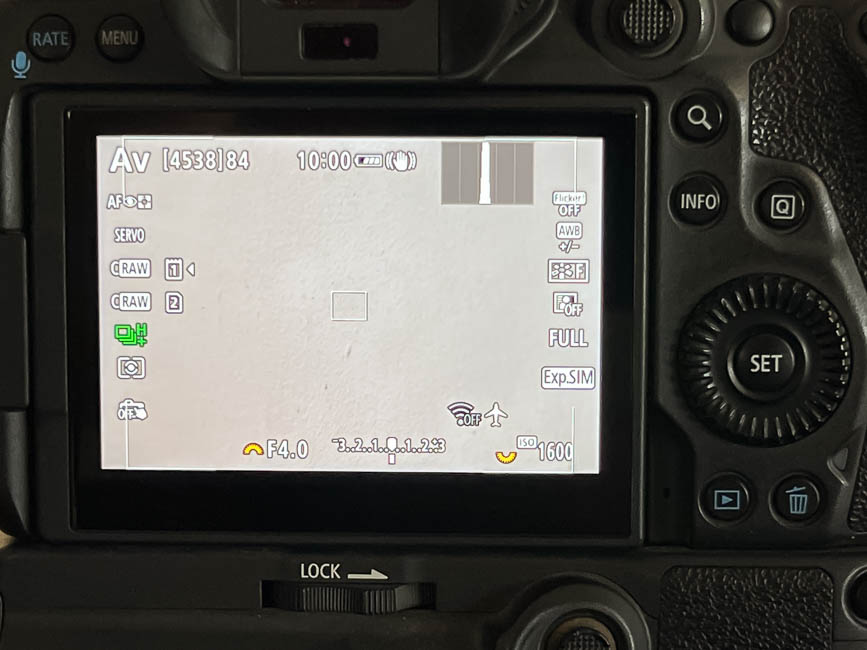
For the most part, I use the first option on the list, which gives me a view that looks like this in the viewfinder:
The only (significant) times when I change this are when I am shooting birds against a clean background. In this case, giving the camera the chance to look across the whole frame to find the subject has yielded far better results in my experience.
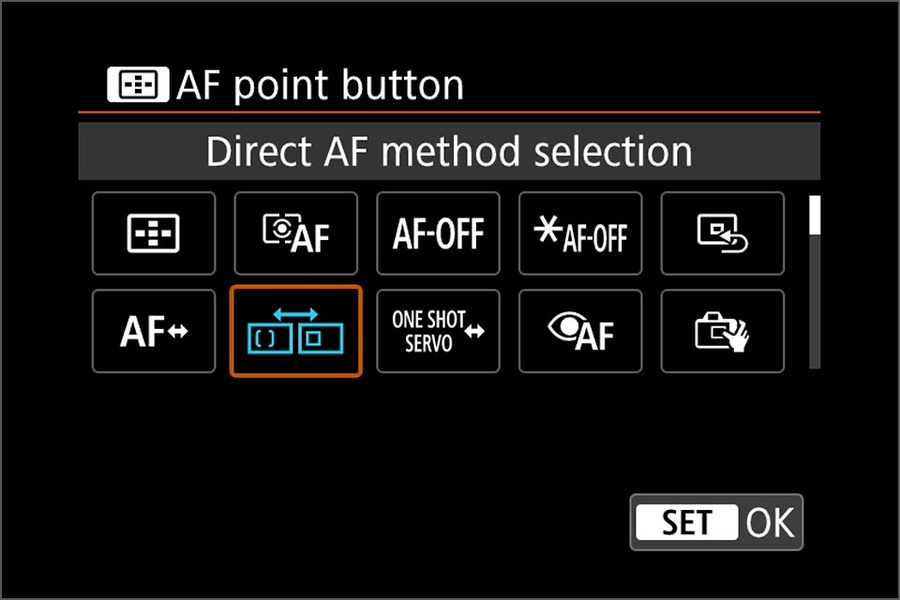
My final tip for the Canon R5 AF system: with the amazing Eye-AF capability, it’s likely that you’ll use that mode, and perhaps a spot AF mode for awkward sitautions, more often than any other. It’s possible to deselect the modes that you won’t often use, and then change the AF-point selection button (top right in the image below) to act as an AF-mode button, which will rotate you through the enabled AF-modes each time you press it. I have only Eye-AF and Spot AF enabled, so each time I press this button, it alternates between the two modes.
I love using the Canon R5. It’s a well-thought-out camera with plenty of capability. Coming from the 1-series Canon cameras, I was expecting to be somewhat underwhelmed by the build-quality, limited functions and some annoying quirks where they had omitted capabilities to maintain the separation with the R3 and the (near-)mythical R1(!). But that wasn’t the case; it’s been a great camera to use and I look forward to many more safaris with it in 2023.